

For Aspiring Bike Mechanics–DIY Headset Tips and Tricks
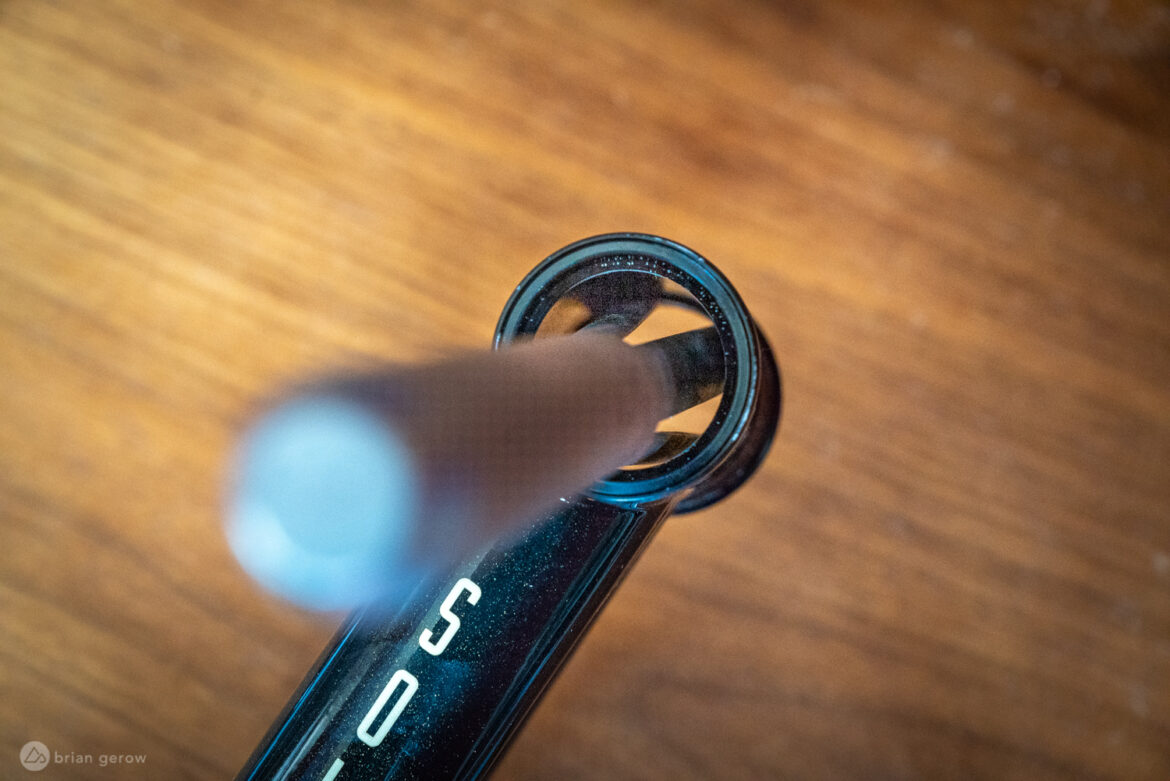
This bike has an built-in headset, so all you may see externally is the massive FSA mud cap. The bearings are seated instantly in opposition to the internal head tube.
Every of the shifting components in up to date mountain bikes makes use of the same system to rotate and slide with minimal friction and most longevity. Studying to keep up and change these energetic elements can save heaps of money and time. A number of DIY mechanic expertise might also present the boldness to dig deeper into the forest with the data you can kind out most mishaps.
The headset in a contemporary bike works equally to the underside bracket normally, and when you perceive one the opposite will seemingly comply with intently behind. There are two fundamental forms of headsets utilized in new mountain bikes: EC or “exterior cup,” and IS or “built-in.” The fundamental distinction is that the EC makes use of a set of metallic cups which can be pressed into the body to carry the bearings, the place the IS model makes use of the body itself to carry the bearings by incorporating a pair of bearing seats into the body itself. Zero stack or ZS headsets are additionally fashionable in trendy frames and performance the identical manner as an EC headset, although the cups sit additional within the body, creating much less stack. Both of those choices will use sealed cartridge bearings in a small number of sizes and shapes, whereas older bikes used unfastened ball bearings of their headsets and backside brackets. This helpful guide from Park Instrument will assist you to decide which model your bike has.
The highlighted hyperlinks beneath will result in associated headset set up movies or articles.
What’s in a headset?
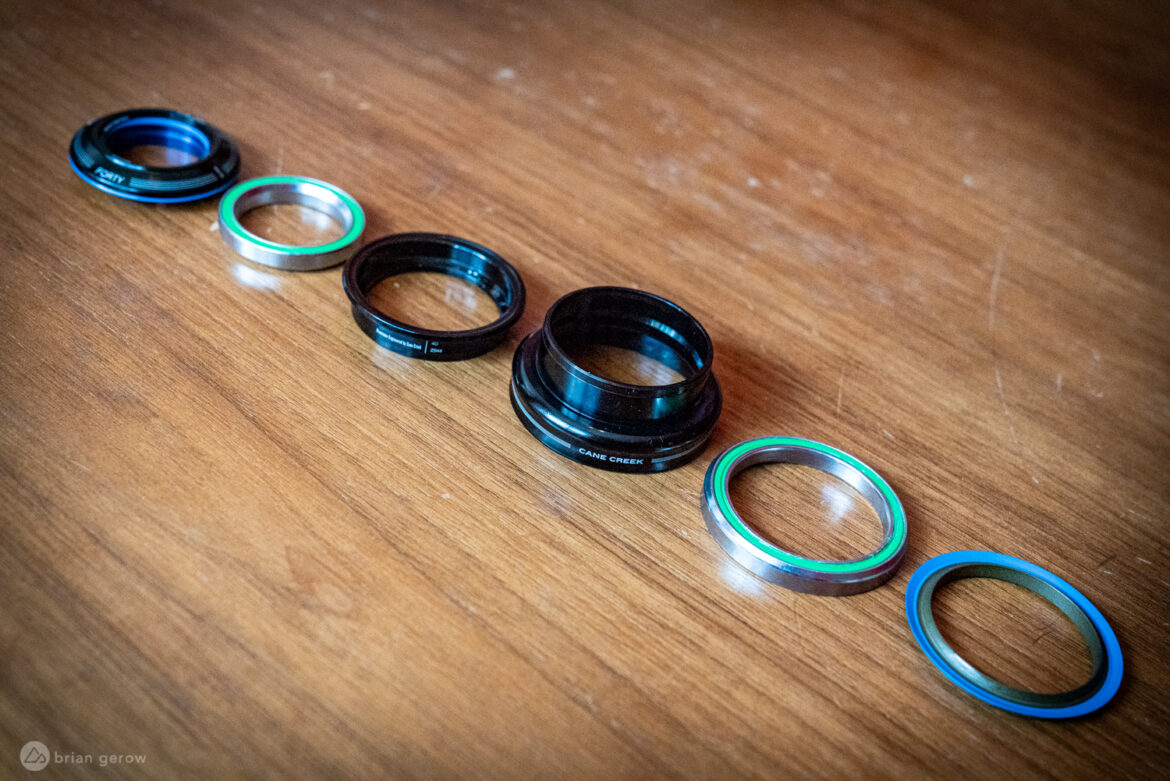 That is an exterior cup headest. Proper to left: crown race, decrease bearing, decrease bearing cup, higher bearing cup, higher bearing, cap or “mud seal”.
A messy pile of elements match below the headset umbrella. Starting from the bottom, there’s the crown race. It is a skinny ring that slides onto the fork’s steerer tube and sits in opposition to the fork crown, permitting a selected headset to work together with a fork. The decrease bearing in a headset can have a unique form relying on the way it’s designed, so the included crown race “pairs” these two elements.
There are additionally reducer crown races which can be designed to mix a fork with a 1″ steerer tube to a body and headset that’s designed to make use of a 1.5″ tapered steerer tube. The crown race takes up house the place the broader steerer could be with the intention to use a contemporary headset and body with an older model slender steerer. Reducer races are sometimes used on new bikes with metal steerer tubes the place the body may also settle for the tapered steerer of a suspension fork. A Surly Karate Monkey is a standard instance.
 A reduce crown race like this one from Hope Tech makes the half fast and easy to put in or take away.
Transferring skyward barely, the subsequent ingredient is the decrease bearing. With almost any manufacturing bike made within the final 5 years, this would be the bigger of the 2 bearings, because it matches across the bigger finish of a tapered steerer tube. The underside fringe of it is going to be formed to sit down flush on the crown race, and the higher edge form will match that of the decrease bearing cup or the body itself.
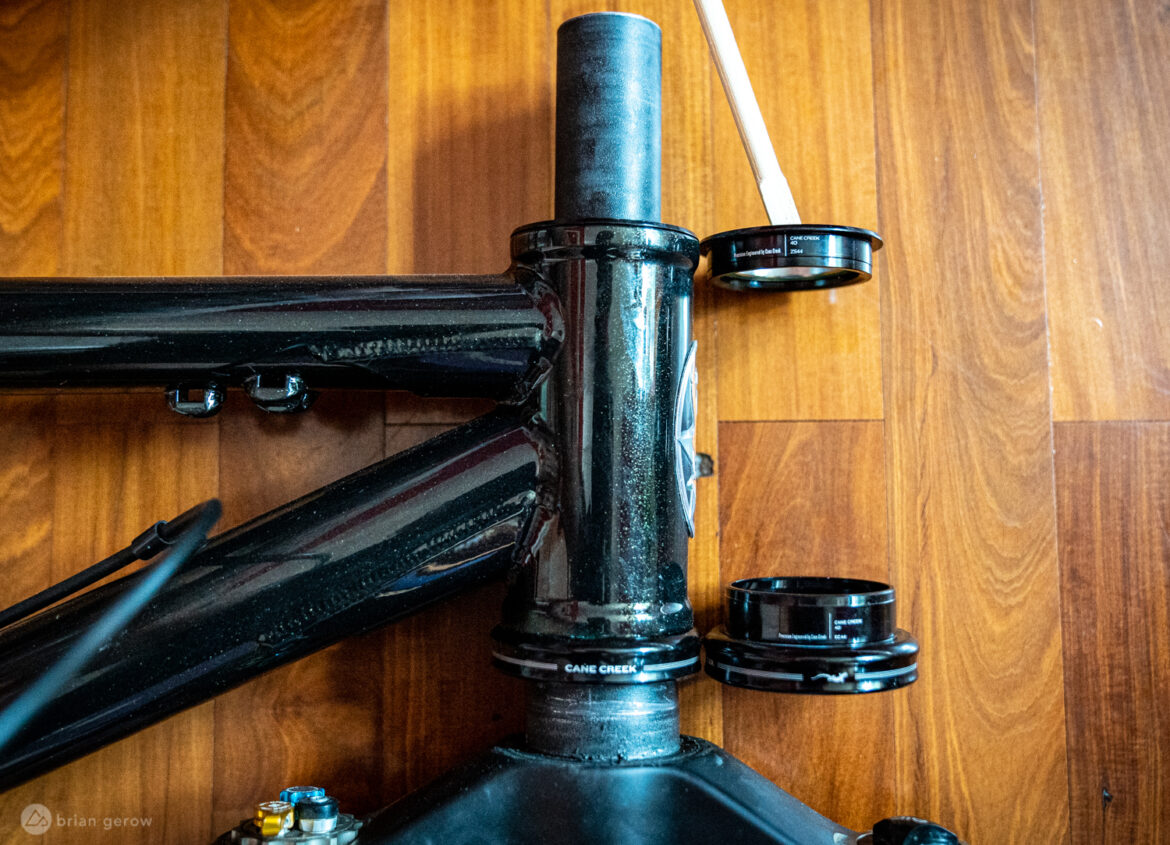 Right here you may see a set of bearing cups pressed into the top tube with a second set alongside it for reference.
In case your body takes an exterior cup to accommodate the bearing, this would be the subsequent headset part in line from the ground to ceiling. The decrease bearing both rests on this cup, or in an identically formed piece of the body.
Above all of that goodness, you’ve gotten the body’s head tube, whereby the steerer tube rotates and the bearings are seated. As you seemingly guessed, there’s one other exterior cup pressed into the higher head tube, or a bearing seat within the body, similar to the decrease. The higher bearing slots comfy into that higher cup or body seat.
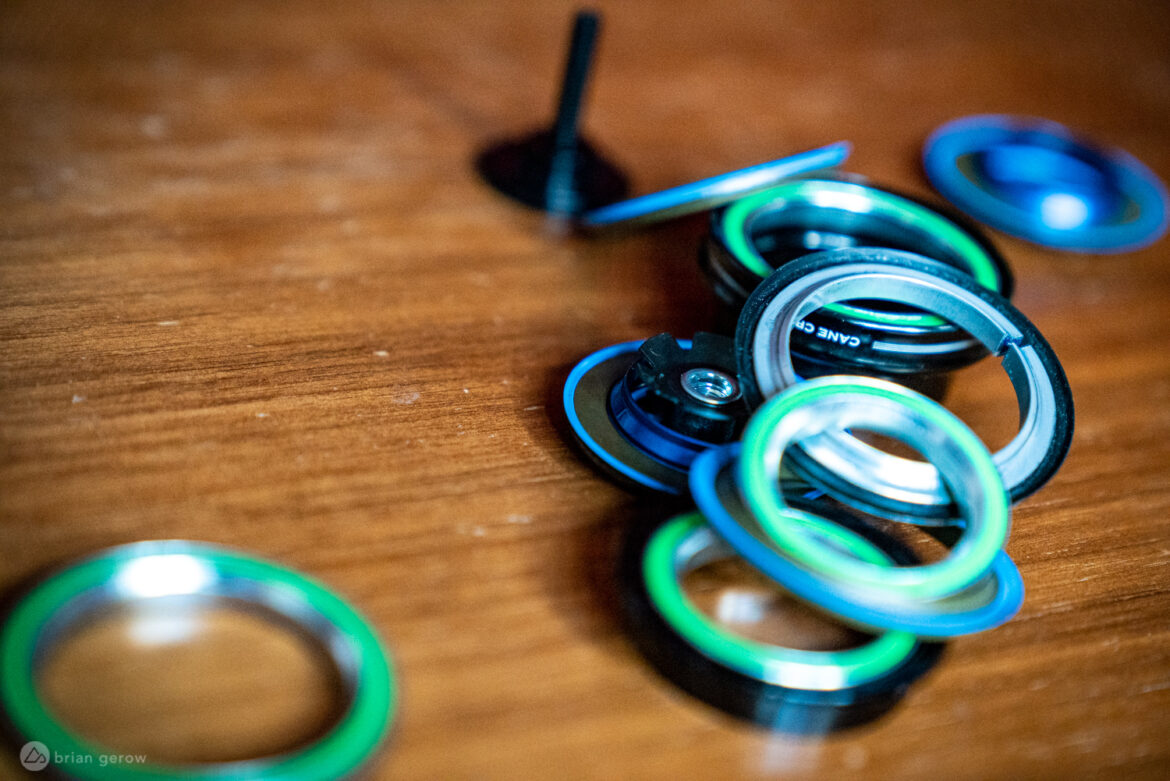
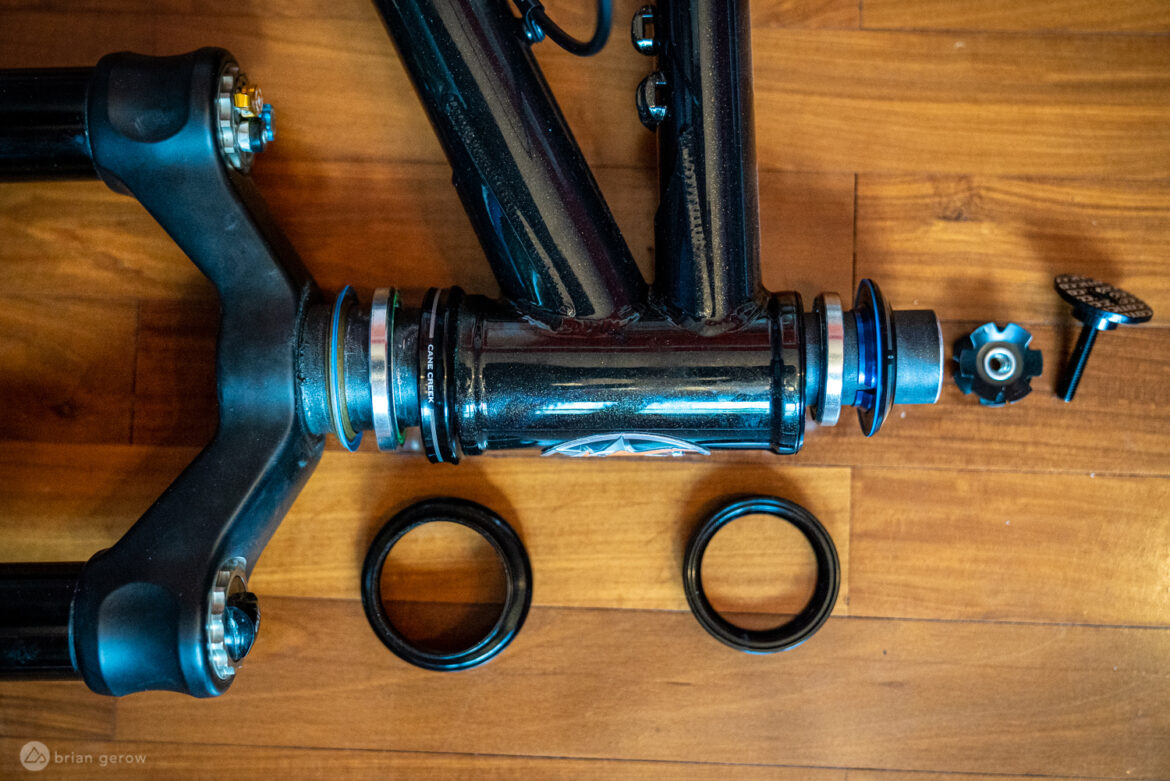 Right here’s one other outlay of head set elements so as, with bearing cups pressed and a second set alongside the steer tube for good measure. From left to proper: Fork, crown race, decrease/bigger bearing, decrease bearing cup, body, higher bearing cup, higher bearing, preload spacer/spacers, mud cap, SFN, preload bolt and high cap.
A preload spacer slots between the higher bearing and the steerer tube to take up house and permit the headset to be tightened correctly. On some headsets, this piece is built-in into the mud cowl, whereas on others it’s a separate unfastened half. Some headsets could embrace a set of skinny spacers that belong on high of the preload spacer to account for variances in body headtube peak above the higher bearing. Add as many of those as mandatory in order that the headset can transfer freely whereas not creating a niche between the mud cowl and the body.
Towards the tippy high, a mud cowl is positioned above the preload spacer(s) to guard the bearing from the weather and permit the system to be tightened correctly.
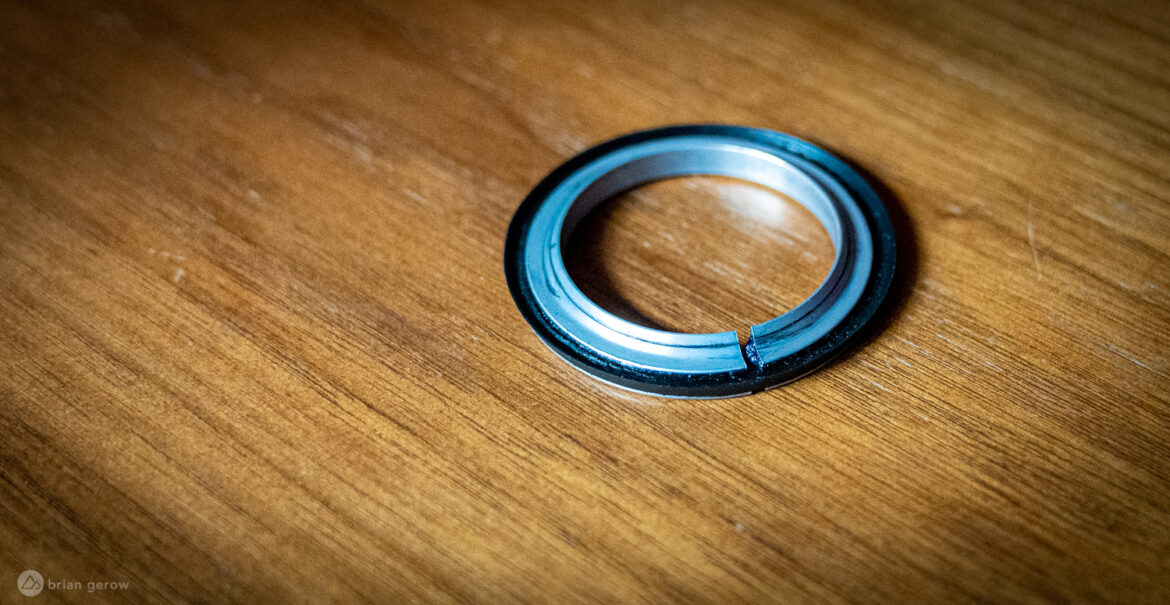
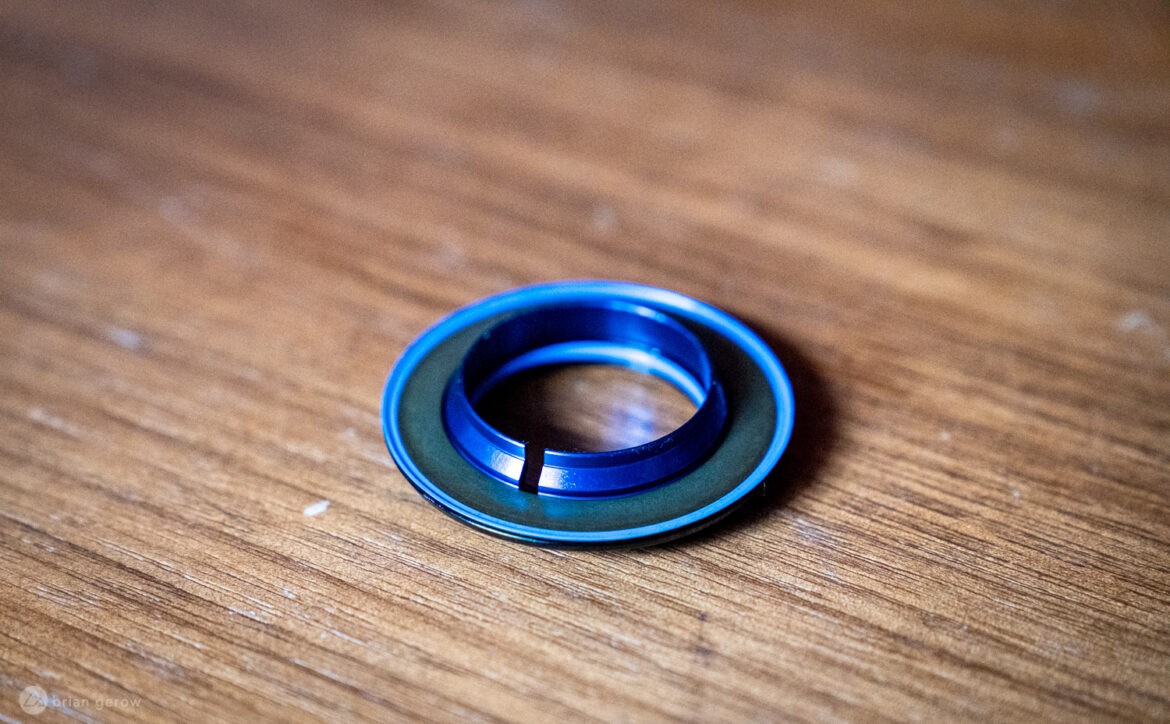 This Cane Creek high cowl has the preload spacer built-in. On different headsets, the reduce blue ring within the heart will probably be a separate piece, slotted between the higher bearing and the steerer tube.
Lastly, the stem spacers and stem refill the remainder of the steerer tube. The star fangled nut (SFN), put in within the steerer tube, permits the highest cap and preload bolt to tug the entire system tightly collectively. Then, the stem bolts are tightened to maintain it comfortable. Now, on to some ideas for headset set up and elimination.

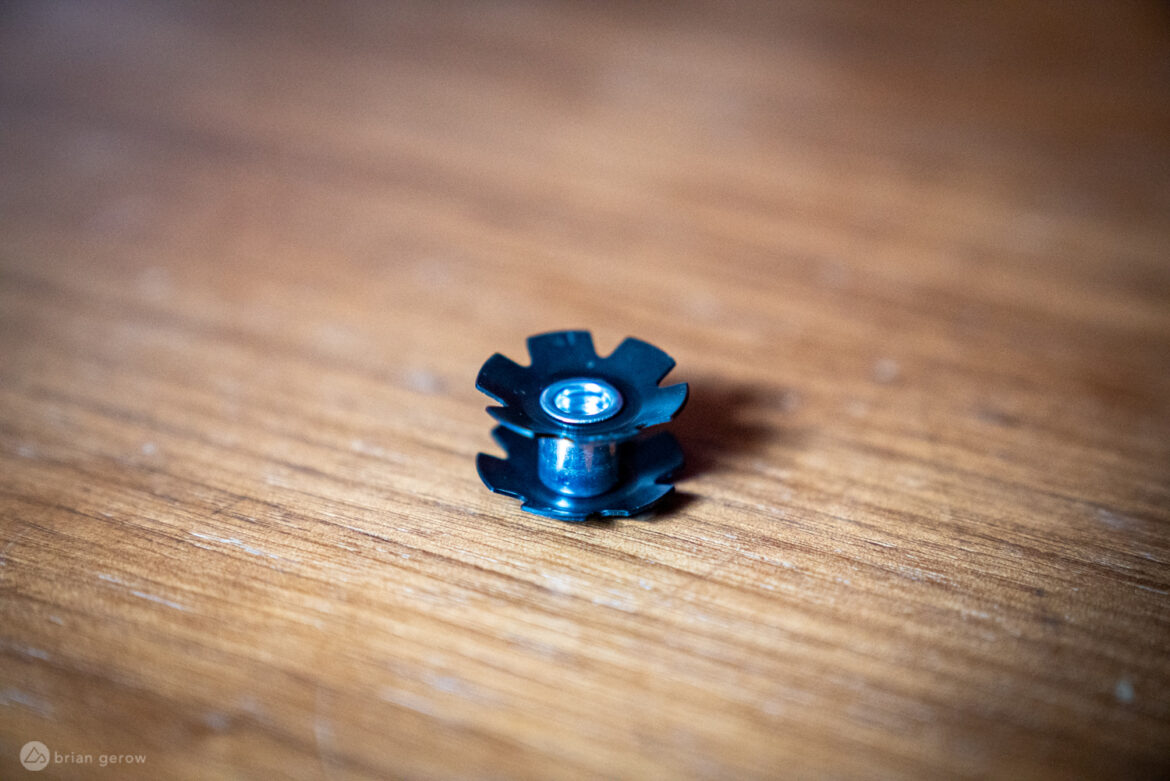
This little bugger, known as the star fangled nut, is pressed into the fork’s steerer tube. Then, the highest cap and bearing preload bolt pull the entire system tightly collectively whereas the star fangled nut grips the internal steerer tube.
Set up trickery
The pile of instruments one may conceivably personal for headset and fork set up is heavier than the body and fork mixed. Instrument corporations make huge crown race setters that match all lengths of steerer tubes, and the software itself is about as cumbersome because the fork. All you really want is a hack noticed or Dremel software and about two minutes. Lower a slot within the crown race, similar to the Hope race proven above, grease the steerer tube the place the race will sit, and slide it in place. It’ll even be decidedly simpler to take away with the slot reduce out.

Images: Jeff Barber
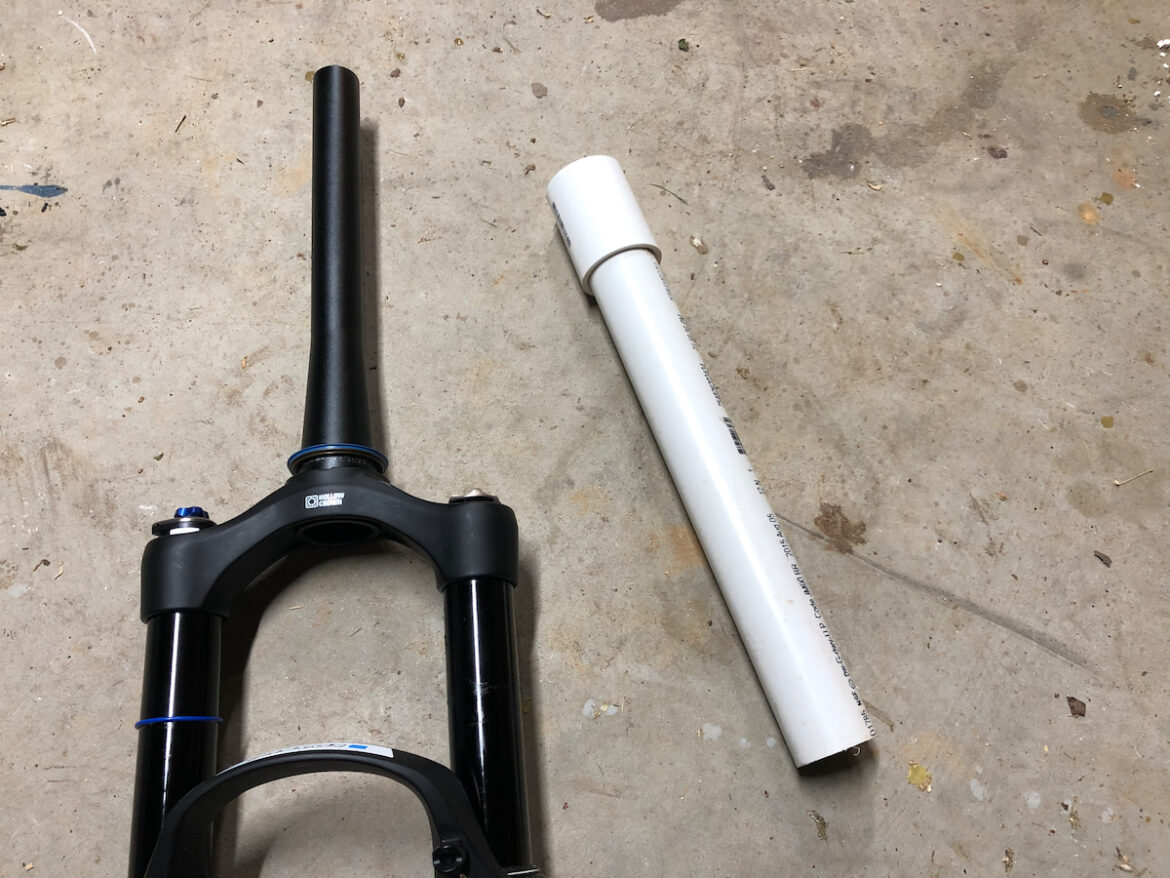
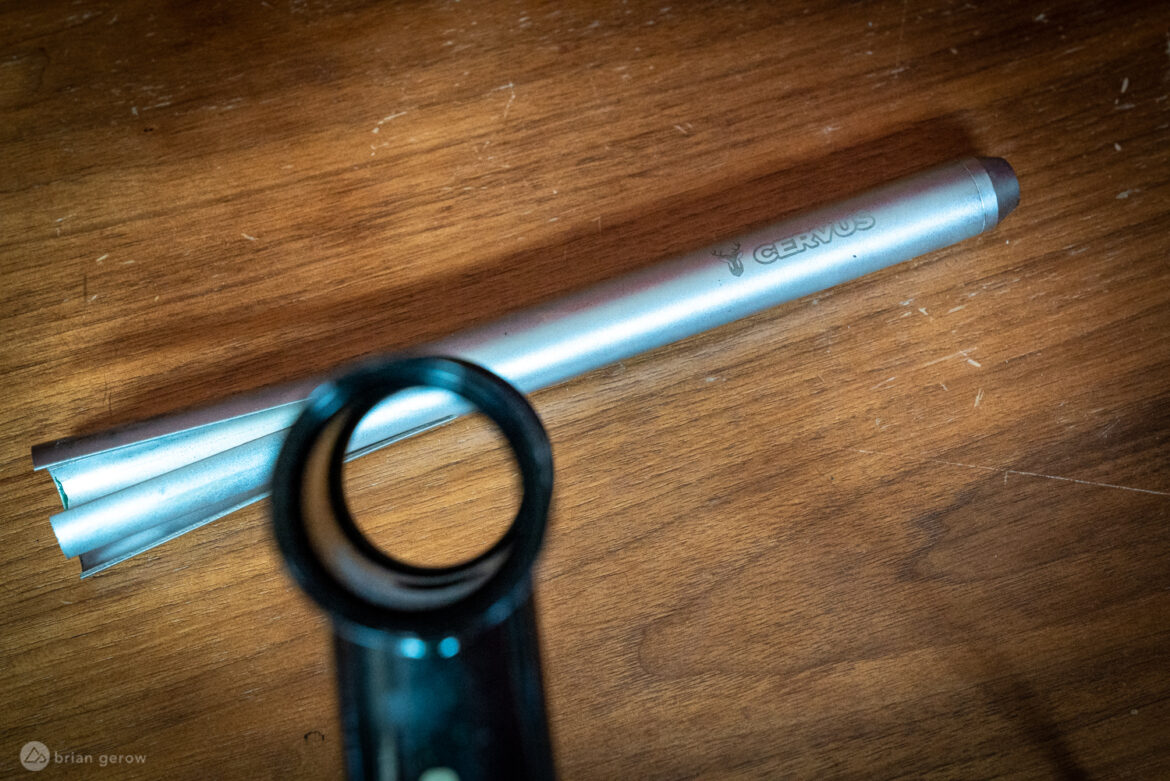
One other fast and cheap method to set up a crown race is with a chunk of plastic pipe just like the one proven above. You’ll want a chunk of pipe that matches over the 1.5″ fork steerer tube, and isn’t any wider than the crown race. Give the greased race a couple of good whacks with the pipe till it’s totally seated.
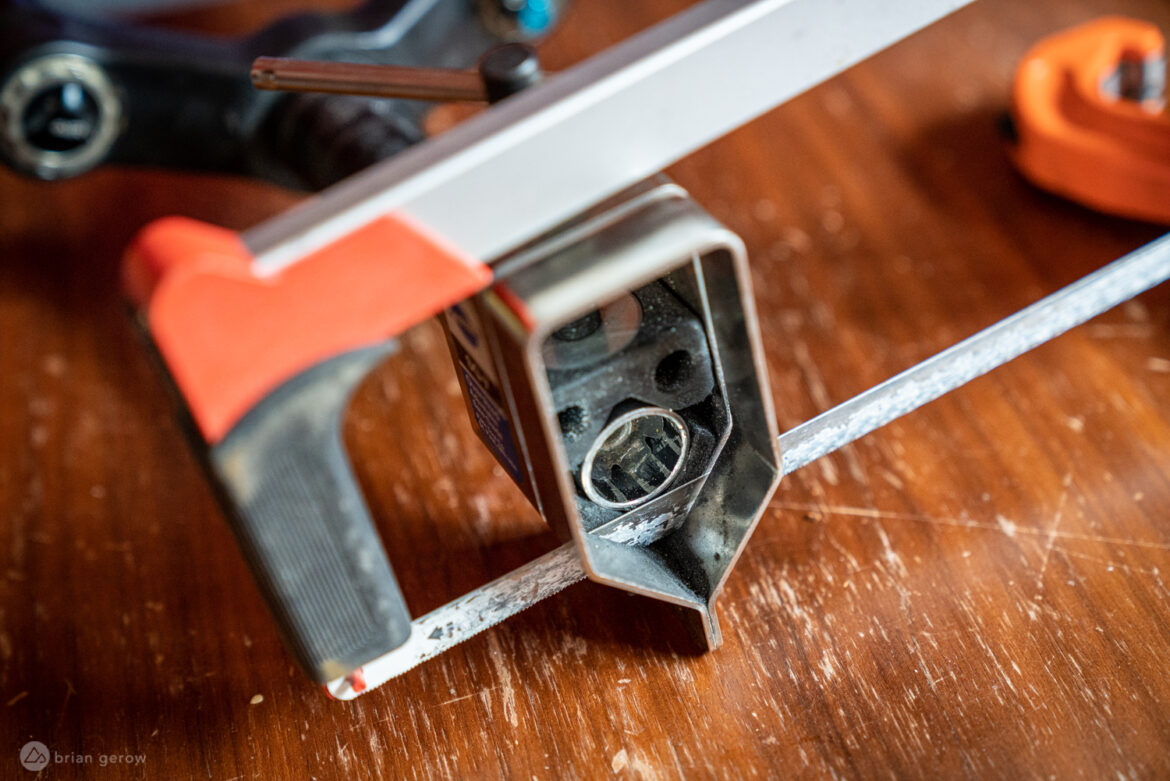
With the crown race comfortable in opposition to the fork crown, it’s time to chop the steerer tube to the right size. It’s a good suggestion to place the steerer within the bike and measure it with all the bearings, spacers, and stem put in. Measure thrice, mark it properly, after which chop it up. You need to use a hack noticed and a blade information like this one from Park Instrument to get a reasonably clear reduce. With carbon steerer tubes like these on a variety of highway and gravel bikes, that is the one method to go, and it’s possible you’ll wish to buy a carbon-specific blade. For aluminum and metal tubes there’s a greater manner.
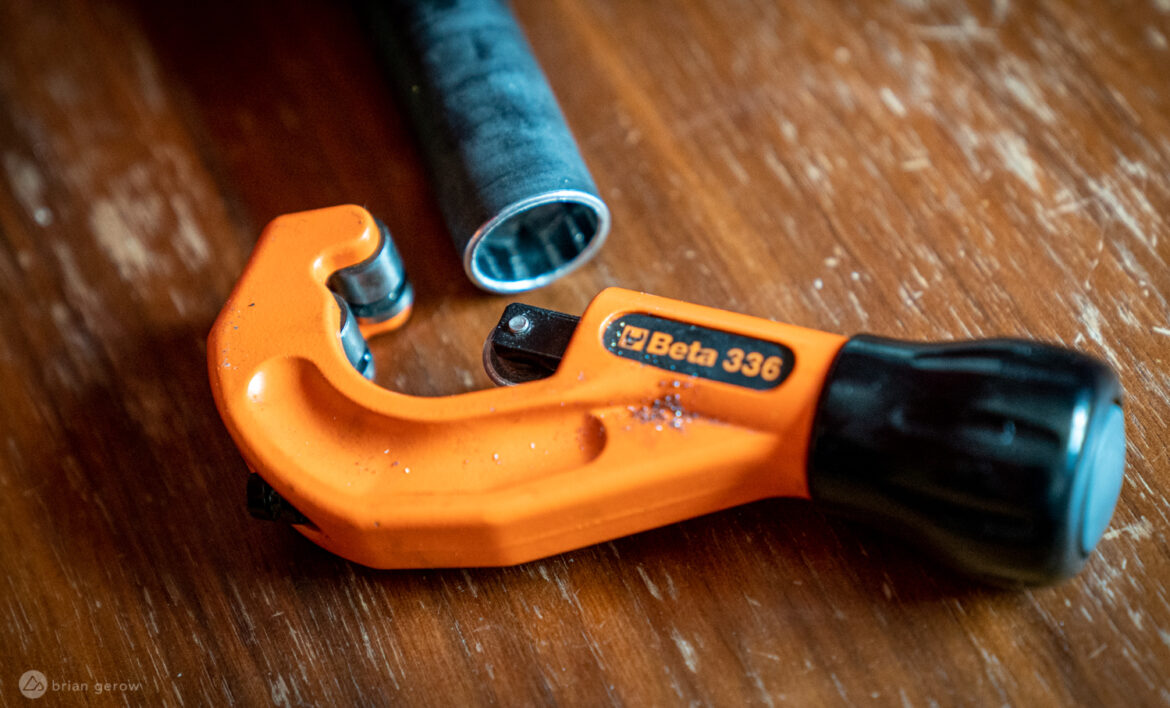
A pipe cutter like this one from Beta provides you with a cleaner completed reduce than any hacksaw may handle. Take it slowly, tightening the blade ever so barely each couple of turns. This technique takes just a little longer than the hacksaw, and the factory-like result’s value it.
No matter the way you slice it, it’s a good suggestion to wash up the sides of the tube earlier than putting in it in your headset. The headset mud cowl has a skinny rubber seal to maintain moisture out, and a tough steerer edge could injury the seal. A pipe reamer is a worthwhile software for the job that may seemingly outlast its proprietor. Make certain to buy one designed for smoothing metallic edges, as there are lighter-weight variations used on plastic pipes. You too can use a flat mill file to wash up the outer fringe of the steerer.
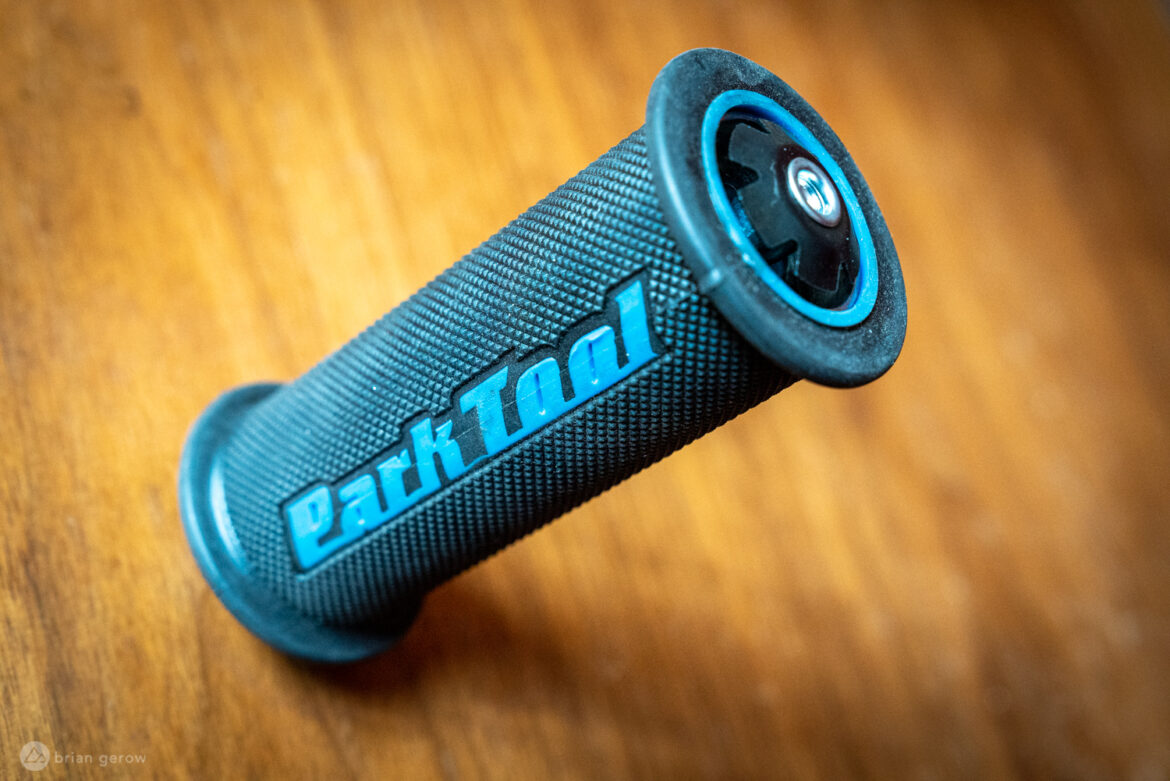
A star fangled nut setter is among the smaller headset particular instruments that’s value buying when you repeatedly work on bikes. In case you solely want it as soon as each few years, it’s seemingly higher to take the fork to a motorbike store.
The star fangled nut will also be put in by inserting a bolt and thoroughly pounding it in with a hammer, however it seemingly received’t find yourself straight and also you run a powerful threat of pinching your hand between the nut and steerer. There are a couple of “hacks” for this set up when you’re actually not keen on shopping for the software.
Another choice is to put in a compression plug into the steerer as an alternative of the SFN. Compression plugs, designed for carbon fiber steerer tubes, broaden as you tighten them in place and basically develop into caught within the steerer. Then, the highest cap and preload bolt can tighten the system in the identical manner they might with the SFN. This may appear much less safe, however do not forget that it’s not the SFN or compression plug that holds your headset tight. That’s managed by the stem because it clamps on the steerer tube. You may even take away the highest cap and preload bolt and go for a trip in case your stem is tightened correctly.
Different alternate options to the SFN embrace any of the steerer mounted stash software techniques that every have distinctive methods of tightening the headset. A number of of these techniques embrace the One Up EDC Tool System, the STASH Multi Tool from Granite designs, the Specialized SWAT system, or the Bontrager BITS.
One different technique to cinch a headset down tight is to ask a good friend or neighbor for assist. Let’s say you’re touring and lose your high cap and/or bolt within the technique of unpacking your bike. The present can go on. Put your bike collectively, as traditional, sliding all the steerer spacers and stem into their traditional locations. Then, have somebody press on the handlebars with all of their weight urgent down into the fork. It will tighten the headset, albeit inaccurately, and you’ll wind the stem bolts in to carry it in place. The robust half is getting the handlebar aligned whereas somebody is urgent their girth into it. After a couple of tries, you’ll seemingly be capable to get the bars aligned and the headset tight.
One of many final steps to a headset set up, earlier than sliding all of it collectively and adjusting the headset is to put in the bearing cups. The video above exhibits simply how to take action with the Park Instrument press. You’ll be able to carry out the identical set up with a threaded rod, some massive washers, and a few nuts. That is one other set up ingredient to carry out with nice endurance, ensuring to grease the body and cup, press them in one by one, and hold the cup aligned with the body’s headtube always.
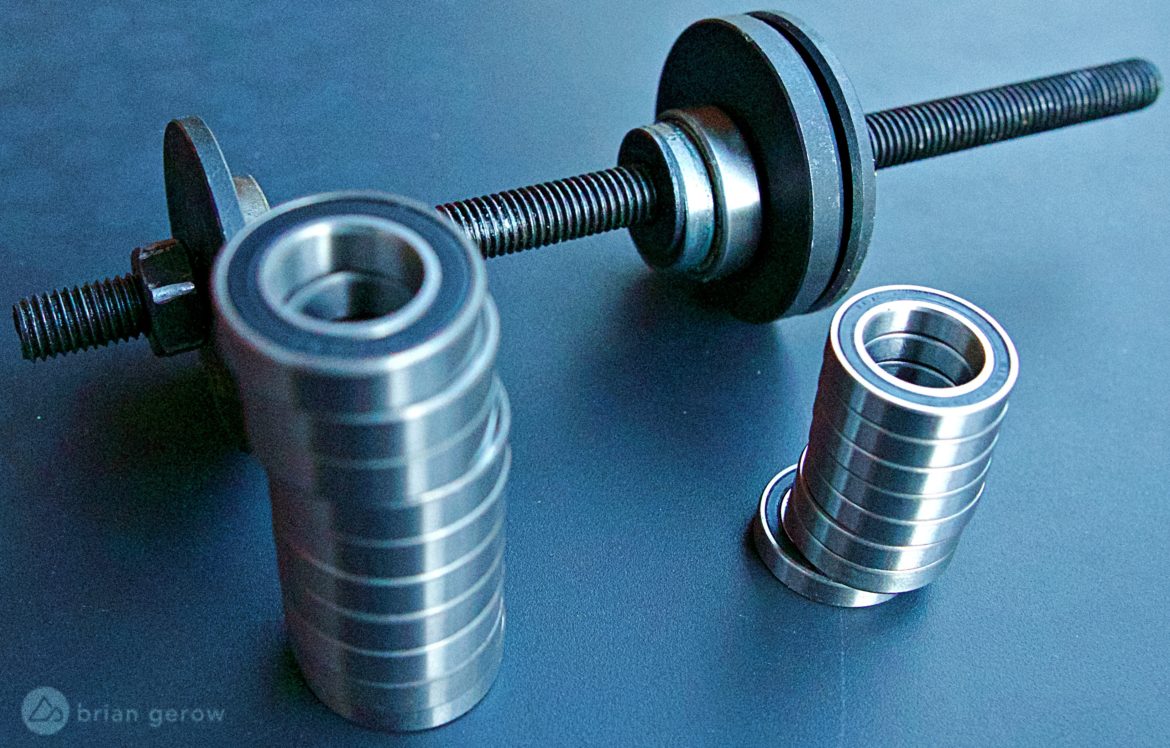
This rudimentary press works properly for putting in wheel bearings, pressed backside brackets, and headset cups alike. The worth is a fraction of the large model within the video above, and it’s sufficiently small that it will probably slot in a cell software field. The bearing drifts included with extra professional-level instruments will also be used with this easy press for a extra exact set up.
Lastly, the “I can’t suggest it” technique of bearing cup set up is what my former roommate known as the “board of future.” The BOD was a discarded chunk of two x 4 pine that all the crusty bike racers in our dingy squat used to put in headsets. It couldn’t get a lot less complicated. Put the headset on the board and line the top tube up with the cup. Then, bang on it with a rubber mallet till it’s in. Violà! We finally purchased a vice and began utilizing that to press the cups wherein labored a lot better.
Headset elimination
Popping the headset out is a far less complicated course of. If in case you have an built-in headset, simply take away the stem and it’ll fall out all by itself. In case your headset makes use of pressed cups, a cup elimination software is a reasonable and light-weight hunk of metal you can additionally use to take away pressed BB cups and bearings. Whereas these will be made out of hardwoods, reduce PVC, a wonderfully formed dowel, and a number of different widespread objects, the software prices lower than $30 and can final so long as you do.
 Gloves are a good suggestion.
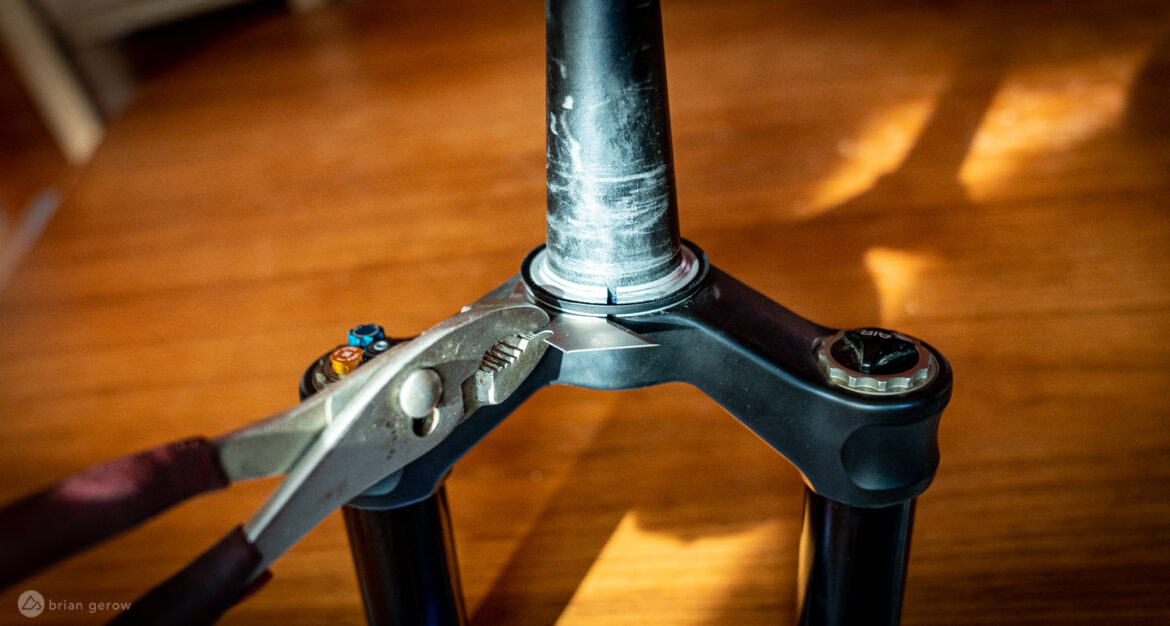
Crown race elimination is the ultimate tough bit. In case your crown race wasn’t greased or reduce previous to set up, it’s possible you’ll have to take it to a store the place they may heft a the six pound software that prices about $270 to interrupt it free. In case you reduce it first, a razor blade and a pair of pliers will do the trick, with out damaging the smooth fork crown materials. Slide the blade below the crown race and wiggle gently till it pops off.
Follow us for more fresh and interesting informatiom about e-bikes/bikes. Offcial website: www.zhsydz.com