
The last episode editor introduces 54 maintenance tips for everyone, have you learned it? Introducing, I will also introduce the remaining 47 tips for everyone. In life, your bicycle does not only rely on the strength of your legs. It also needs a bit of lubricating oil, a lot of love and good listening. You may not know all the remedies needed for your bicycle to live longer, but you can gain enough wisdom in the process to keep it in top condition and leave the store with proper bicycle maintenance.
This series of almost eternal recommendations (until advances in bicycle technology make some of them obsolete) will guide you through your role as the primary caregiver-so you can leave the tricky things to the professionals.

No 55 If you store your tools in the toolbox, please use the corresponding drawers or slots to color-code them. If you have a pegboard in your store, track each tool where it hangs. Everything will be easier to find.
No. 56 No matter how long it takes, invest in high-quality bicycle tools until you have a complete set of basic knowledge. See our list of basic tools.
No. 57 When making overall adjustments, adjust from front to back or top to bottom so that you know where you are when you are disturbed.
No. 58 When you disassemble complicated things, use your smartphone or digital camera to record the process. If you get an extra part after reassembly, you can review your photos to find out when and where the problem occurred.
NO. 59 Do not turn your bicycle upside down for maintenance. You may damage cables, accessories, and even your saddle. If you do not have a repair stand, please find a way to hang it.
Develop good hygiene habits
No. 60 wets the edge of the cloth with degreaser, and then slides it back and forth between each gear to clean the tape.
No. 61 Wipe the dust seals on the suspension parts after each ride.
No. 62 sandblasting your bicycle with a high-pressure hose, presses unwanted grit and dirt into your bicycle, and blows out the much-needed grease and lubricating oil. Use a bucket of water and a sponge instead.
No. 63 Use rubbing alcohol to remove the black dirt on the rim.
Do not. 64 Don’t be afraid to scrub your bar tape. Assuming it is wrapped properly, it can handle elbow grease.
More wear and tear
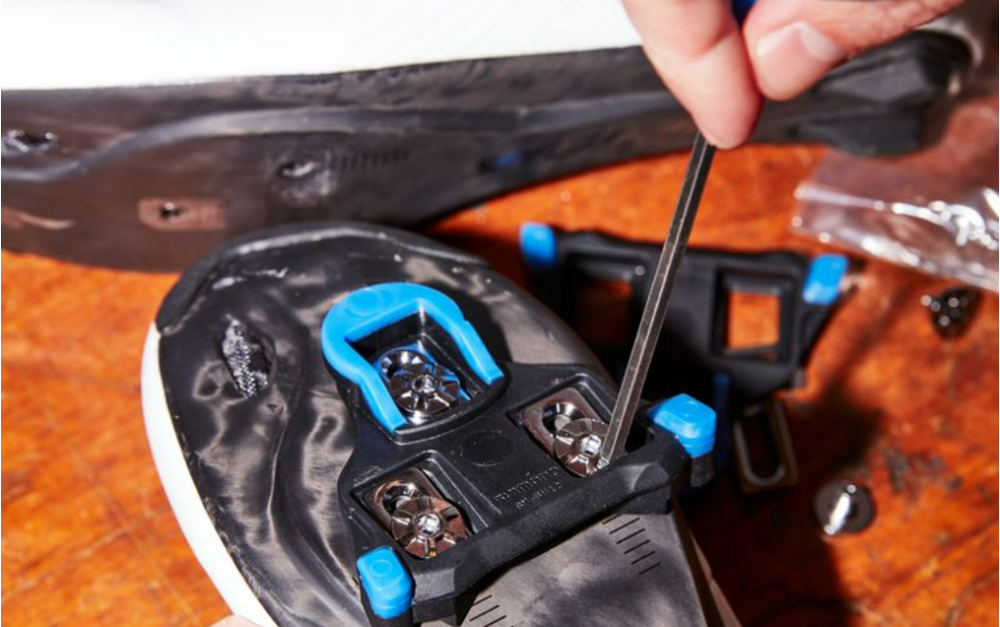
No. 65 worn out cleats may accidentally loosen or get stuck on the pedals. Replace them when the wear indicator tells you.
No. 66 When storing the bicycle for a long time, switch to the smallest gear and ring combination. It will prevent your derailleur spring from wearing out.
No. 67 Replace worn seatpost clamps. If you continue to ride on it, your saddle will not be able to maintain its position.
No. 68 When your sprocket teeth start to look like shark fins, it’s time to replace your sprocket.
no. 69 The thin rims on the sidewalls of the tires may fail under pressure and cause you to crash. Check the rim by looking for the concave part or sliding your finger along the braking surface to check the rim.
No. 70 chain and gear wear together.
No. 71 If you don’t have a chain checker, find a ruler. When the size of the 24 links of the chain from rivet to rivet exceeds 12 1⁄16 inches, it is time to replace the chain. Once the measured value reaches 12 1⁄8, your gear may also be hit.
No. 72 Use neat electrical tape or non-slip bathtub tape to protect your frame from rubbing.
Correct-most of the time
No. 73 To tighten the loose earphones, please loosen the valve stem, tighten the top cover, and then re-tighten the valve stem.
No. 74 Install a new pedal? Make sure to thread the left pedal into the left crank and the right pedal into the right crank (should be marked). If you swap them unintentionally, you may need to buy a new crank. The good news is that your pedal may survive a mistake.
No. 75 To remove the pedal, set the drive side crank at 9 o’clock for better leverage. Then turn the wrench clockwise to loosen the non-drive side pedal, and turn counterclockwise to loosen the drive side pedal.
No. 76 Loosen the stem bolts instead of the roof bolts to straighten the crooked handlebars.
No. 77 Straighten your wheels-no need to trim the bracket.
No. 78 Glue a tube. This is easier than you think.
Tool rule
No. 79 When using a chain tool to break the chain, do not push the pin all the way to the end (unless you are using a special replacement pin). You will not be able to retrieve it.
No. 80 To close the quick release fork correctly, tighten the nut on the other side until it is secure, and then turn the lever to the closed position. You should feel resistance, but still be able to close the lever completely. If not, open the lever, loosen the nut slightly, and try again.
No. 81 Understand and understand how to use torque wrenches. This is the only way to tighten the bolts correctly.
Tricks
No. 82 is not the same for all chain lubricants. Choose the one that best suits your riding conditions.
No. 83 carbon fiber seatpost will always get friction paste regardless of the frame material. Regardless of the material of the pillars, the carbon fiber frame will always get friction paste. Metal frames and pillars always have anti-seize agent or grease.

After No. 84 lubricates the chain, back up a few turns, and then wipe the chain with a clean dry cloth. The lubricating oil is now located in the rollers and between the plates. The rest will only attract scum.
No. 85 applies lubricating oil on the rollers of the chain, not on its side plates.
No. 86 uses friction paste on carbon parts, which contains fine grit. Grease will make them slip.
No. 87 When lubricating the suspension fork, please use the lubricant recommended by the manufacturer. Other types can decompose internal plastic and rubber parts.
No. 88 Do not clean the oil film on the new chain. This is better than what you will wear in the future. Start your lubrication habit after the factory grease wears out, which usually requires about two rides.
Flat truth
No. 89 Without levers, you don’t need strong hands to change apartments; it all depends on the right technology.
Article 90 If you do not remove the irritants from the inside of the tire-thorns, glass, stones, metal shavings-or look for tears in the sidewall of the tire, you will blow the tire again. Then again.
no. 91 Do not apply the patch to the tube until the glue you applied changes from transparent to turbid.
No. 92 When replacing the spokes, make sure that they are the correct length. For too long, you may run the risk of puncturing the tube.
Economic inflation

No. 93 In order to reduce the damage of the valve, between 10 o’clock and 2 o’clock, inflate the tire with the valve stem facing down.
No. 94 To install the tire on the tubeless rim more easily, use a compressor to inflate.
No. 95 uses both hands when operating the floor pump.
Some pump heads of No. 96 are pushed down and clamped by levers; others are pulled up. Know which one you have. If you force it, you may break the seal.
No. 97 Before replacing the plate, exhaust as much air as possible from the punctured tube. It will be easier to remove the tires.
When you are not riding
No. 98 Hang the hook in your garage to keep your bicycle vertical. Putting it on its side will cause your derailleur to malfunction.
No. 99 stores the mountain bike with the front fork legs facing up so that the oil can flow down and the foam ring under the seal is kept well lubricated.
No. 100 If you have no choice but to store the bicycle on the wet concrete garage floor, place the cardboard under the tire to prevent the outer shell from drying out.
No. 101 regularly check your carbon fiber frame for cracks and repair the scratches with a few layers of clear nail polish.
If you want to know more professional knowledge, please pay attention to our website