In a world focusing on range, motor output, and battery size the physical elements of ebikes can often go overlooked. However, gearing and changing gear is just as important on an electric bicycle as it is on a regular bicycle. Understanding ebike gears might seem basic to some but to many, both new and veteran riders, it is often overlooked as unnecessary; after all you’re motor-powered! But using electric bicycle gears properly allows a rider to maximize their energy output, along with that of their motor, so that both can last longer and travel further and, ultimately, so the rider can have an even better experience doing it.
Electric bike gears are different from levels of pedal assist and learning how to use electric bicycle gears in tandem with pedal assist can help you achieve the smoothest and most energy-efficient ride; for both you and the battery.
Learning how, when, and why to shift gears on an ebike can increase your confidence in your riding ability and can stop you and your motor from pushing too hard in too high a gear. It can also stop you from pedaling furiously in too-low a gear, expending excess energy to go nowhere. Here we’re going to discuss everything from the gearing systems out there and how they work to ebike gear shifting and electric bike riding tips and best practices when it comes to gear management. First, we’re going to run through the types of electric bicycle gears available out there.

TYPES OF ELECTRIC BICYCLE GEARS
Before we get into ebike gear shifting, we need to first familiarize ourselves with the types of electric bike gear available. There are two types of ebike gears out there on ebike: derailleur gears and hub gears.
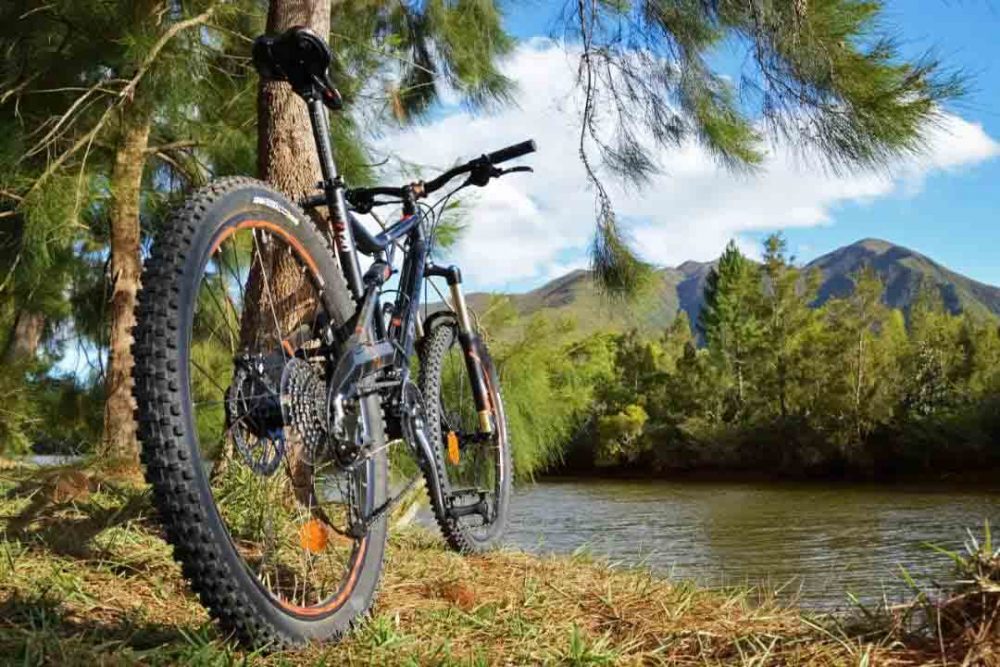
Derailleur GearsDerailleur gears are the most universal and most popular gearing systems on ebikes (all of our ebikes have derailleur gearing systems) and have been lifted straight from their manually powered cousins. Derailleur gearing systems consist of a “cassette” of gears attached to the hub of the back wheel that, via a chain, are connected to the “chainring”, the cog the pedals are attached to; which is called the “crankset” when talked about as a combined unit of pedals and chainring.
Derailleur gearings can vary widely, with some having 3 chainrings and 12 cogs on the cassette, giving them 36 gearing options! Ebikes don’t need as many gears and only have one chainring and, typically, 6-9 gears on their cassette. Gearing works in ratios and on a derailleur gear setup this is determined by the ratio of teeth on the chainring to the ratio of teeth on the cogs on the rear cassette; teeth being the spikes that link in with the chain. Different use cases, e.g. commuter biking and mountain biking, require different gear ratios for their different purposes, e.g. commuters want to get off the line quickly and keep up to the speed of traffic, whilst mountain bikers want to be able to climb steep, uneven terrain.
Derailleur gear systems are named for the derailleur element of the system; the bracket containing two cogs that hangs below the cassette. This is connected to a mechanism on the handlebars, typically via a cable. Adjusting the handlebar end of the mechanism increases or decreases the tension on the cable, in turn moving the derailleur up or down the cassette of cogs, thus changing the gear.
Derailleur gears are preferred over other gearing mechanisms for the following reasons: initially, they’re much cheaper to purchase, then they’re easier to clean, work on and replace than their hub geared counterparts. The downside of derailleur gears is that they are open to the elements and will get dirty and, as a result, noisy and harder to shift over time. This means that they require cleaning maintenance, but this can easily be accomplished at home or completed by your local ebike shop.
Hub Gears
Hub gears are fully encased in the hub of the rear tire; where the motor is located in and so many other brands of ebike. These hub gears are complex pieces of equipment with various cogs whirring away inside the small hub. They’re still chain driven, with a chain connecting the crankset to a single cog on the back wheel, which pushes power into the geared hub which mediates how that pedal power is transferred to the wheel.
Instead of levers, hub gears usually operate through a twist grip and, unlike their derailleur counterparts the rider can switch gears whilst at a standstill without issue, and they can shift through several gears at a time without detriment to the system.
With just two cogs, one at the pedals and one on the hub of the rear wheel, and no switching of cogs as in a derailleur system, the chain and exterior cogs on the hub gear system are put under less stress than the derailleur systems; they can even be belt-driven, instead of chain driven. This ultimately means that these components last longer. Include the fact that the hub is fully enclosed and can’t be affected by the elements, hub gears seem like the best option out there.
Hub gears do, however, have their drawbacks. They offer a much smaller range of gears than their derailleur counterparts and are much less energy efficient because a large number of moving parts inside the hub create much more friction and sap more energy than their inline derailleur opposition; reducing the ebike’s range. They’re also heavier and much more expensive than the alternative, and it’s much harder to remove the wheel to fix a flat. Finally, when a hub geared system does break down it requires a specialist to fix, which can be a time-consuming and expensive process; plus experts are quite few and far between.

SHIFTING MECHANISM
If you’ve got gears then you want to use them and shifting mechanisms allow a rider to do this. Here we’re going to cover the gear shifting mechanisms available for derailleur gears. The most popular shifting method in the biking and ebiking world are levers. Levers are located on the handlebars and are operated with the rider’s thumb. These are connected to one end of a cable, or a tube filled with mineral oil (a hydraulic system), and when an adjustment is made it increases or decreases the tension on the cable, moving it up and down the cassette. The same functionalities can be achieved through a twist grip, much like a motorbike accelerator, on the handlebars. Hydraulic systems are becoming more popular because they don’t suffer the same stretching over time, requiring more adjustments, than cabled systems do.
Electronic methods also exist and claim to be much more precise, with some even claiming to calibrate themselves; which all means less maintenance. There are a few notable electronic shifting mechanisms but these are relatively new to the market and their full potential is yet to be realized.
THE IMPORTANCE OF CADENCE
Before we go through the tips for getting the most out of your ebike we must first mention cadence. HOTEBIKE, in the cycling world, is:A Cyclist’s pedaling rhythm i.e. how many revolutions their legs, not their wheels, makeover a certain period, typically measured over a minute and called RPM (Revolutions Per Minute).The optimum cadence for the average cyclist has been determined to be 60 rpm which makes it an easy 1 rotation of the pedals per second. To compound this, studies have shown that amateur cyclists rarely benefit from pushing their cadence above this 60 rpm range. These studies and much of the information in this sector are derived from the regular cycling world, but riding an ebike doesn’t invalidate these claims. Indeed those riding ebikes with pedal assist levels might want to see 60rpm as their limit unless they’re wanting to push themselves physically.
EBIKE GEAR SHIFTING AND EBIKE RIDING TIPS AND BEST PRACTICES
Becoming a more energy-efficient rider is not difficult and, once you’ve paid attention to the details on a few rides, it quickly becomes second nature!
Compared to riding a regular bicycle, riding an ebike requires balancing electric power-assist with the mechanical gearing of the bike and your physical input. The ratio of how all these factors work together changes with each person and each person will find their own balance between them and their ebike. This balance between your ride and your abilities is supplemented by the 10 tips and best practices below.
1. Aim to keep your cadence around the recommended 60rpm.
2. Adjust your gear and pedal assist shifters’ position on your handlebars so that they’re in the most comfortable position for you to use whilst riding. After adjusting them, and before riding, make sure to “stress test” them by turning your handlebars to the extreme left and right. If, when performing this stress test, if the cables are strained you should readjust the shifters so they’re not. This will prevent costly breakages from occurring.
3. Adjust pedal assist level for big changes, mechanical gears for small changes. That is to say that upping or lowering the level of pedal assist will have a much larger effect on your momentum and cadence than doing the same with a mechanical gear.
4. When switching between mechanical gears, continue pedaling at a smooth pace. This helps to ensure a smooth and easy transition between gears, your motor may pause as you shift but this is normal and is put in place to protect the drivetrain.
5. Anticipate the terrain in front of you, changing your gear and pedal assist level to suit what’s ahead e.g. approaching an uphill section a rider can drop a gear or two and raise their level of pedal assist; approaching a downhill gradient a rider can drop their pedal assist, maybe turning it off completely, and go up a gear or two.
6. When in doubt, stay in lower gears. It’s difficult to change down when you most need to and much easier to change up.
7. When stopping, turn down through levels of pedal assist until it’s off and then turn down through your mechanical gears. Starting in this lower gear makes it easier to take off from a standstill and puts less strain on your brakes when stopping.
8. Don’t change gears when stationary. If you’re in the wrong
9. Don’t shift through multiple gears at one time. Wait for each gear to be fully engaged before shifting to the next.
A FINAL WORD
How to shift gears on an ebike is a common question and is often confused with optimizing gear shifting on an ebike. Now that you know how ebiking gearing systems work, the benefits and drawbacks of each system, and how to optimize your riding for both your energy expenditure and your battery you can sit back in the saddle and relax knowing that you’re getting the most out of your beautifully smooth ride beneath you.
10. Higher levels of pedal assist call for a higher gear. All gears can be used will all levels of pedal assist. However, to optimize your power output raise the level of mechanical gear as you raise your level of pedal assist.
Our factory provide OEM and ODM,if you are interested in our electric bike, you can log on our official website to know more about details. If you have any query or electric bicycle transportation problem,please feel free to contact us and we will contact you APSAP. https://hotebike.en.alibaba.com/
Read more bike tips:
Ask Electric Bike Report: Are e-bikes safe for seniors
How to Start Commuting on an Electric Bike
Can an Obese Person Ride an E-Bike
 Shuangye ebike
